Home Blog

OnePlus 13 Specification | Price | Review | Features

0

The upcoming OnePlus 13 is shaping into a highly anticipated flagship device, packed with cutting-edge technology and features. Slated to be one of the first smartphones powered by the Snapdragon 8 Elite chip, this device promises to deliver unmatched performance. Let’s dive into what we know about this exciting release.

What is the OnePlus 13?

The OnePlus 13 is OnePlus’s next big release, expected to be its flagship smartphone for 2025 unless the company introduces a successor to its foldable series, like the OnePlus Open. The phone is likely to have at least 12 GB RAM, with a higher-end variant offering 16 GB RAM and up to 512 GB internal storage.

Key Features of the OnePlus 13

1. Display

  • The OnePlus 13 is rumored to feature a 2K resolution display made by BOE, a top-notch OLED screen with a peak brightness of 6,000 nits, and 1,600 nits in high-brightness mode.
  • Unlike its predecessor, which had a curved display, the OnePlus 13 might come with a flat display, offering more durability, and potentially including the latest Corning glass protection.

2. Snapdragon 8 Elite Chip

The OnePlus 13 will be powered by Qualcomm’s Snapdragon 8 Elite chip, making it one of the fastest smartphones on the market. This chip will boost CPU, GPU, and NPU performance, enabling users to multitask efficiently, enjoy immersive gaming, and experience improved AI features.

3. Tidal and Aurora Engine

In addition to the Snapdragon chip, the OnePlus 13 is said to feature OnePlus’s self-developed Tidal Engine and Aurora Engine, which will help optimize the system for even better performance, enhancing the overall user experience.

4. Operating System

  • The Chinese version of the OnePlus 13 will run on ColorOS 15, while the global version is expected to ship with OxygenOS 15.
  • OxygenOS will be bloatware-free and similar to iOS 18 in terms of lock screen customization, while also offering an AirDrop-like file-sharing feature.

5. Battery and Charging

The OnePlus 13 is rumored to feature a 6,000 mAh battery, offering excellent battery life similar to the OnePlus 12, which had a 5,400 mAh battery. In terms of charging, the OnePlus 13 might stick with 100W fast wired charging and 50W wireless charging.

Will the Charger Be Included?

Reports suggest that the OnePlus 13 might not come with a charger in the box, following the trend set by other smartphone manufacturers. Instead, it will likely include the iconic red USB-C cable. Users may have to purchase a fast charger separately, which could increase overall costs.

OnePlus 13 Release Date and Price

The OnePlus 13 is expected to launch in China first, around late October 2024, and make its way to India by late November or early January 2025. The price of the base model is anticipated to be around ₹65,000, with higher storage models costing more.

Conclusion

The OnePlus 13 is poised to be a major player in the smartphone market, with its Snapdragon 8 Elite chip, top-tier OLED display, and enhanced performance features like the Tidal and Aurora engines. While some may be disappointed by the potential lack of a charger in the box, the overall package still makes the OnePlus 13 a compelling choice for tech enthusiasts and power users alike.

Make sure to keep an eye out for the official release in the coming weeks as OnePlus reveals more details about its next big smartphone.

Key Things Your Online Business Needs to Get Right to Keep Your Customers

0

Running an online business? Want to keep your customers happy, and more importantly, coming back time and time again? Here’s what you need to get right;

1. Website Speed

First things first, if your website loads at the speed of a sloth on a lazy day, you’re in trouble. In the online world, speed thrills. Slow speed kills… your online business. Customers expect pages to load faster than they can say, “Is my Wi-Fi out?” Optimize your images, streamline your code, and consider a better hosting solution if needed. Keeping your website zippy will stop potential customers from bouncing faster than a rubber ball.

2. User Experience: Don’t Make ‘Em Think (Too Hard)

Ever walked into a store where everything is a mess, and finding what you want is like playing “Where’s Waldo?” That’s what a poorly designed website feels like. Your site should be intuitive, clean, and easy to navigate. Make sure your menu is straightforward, your search bar is easy to use, and your checkout process is simpler than assembling a two-piece puzzle. The smoother the shopping experience, the longer your visitors will stick around—and spend.

3. Win Those Phone-Wielders Over

With more than half of the internet’s traffic coming from mobile devices, if your site isn’t mobile-friendly, you might as well be closed every time someone’s on their phone. Make sure your online store looks good and functions flawlessly on mobile devices. Buttons should be thumb-friendly, and text should be readable without a magnifying glass. A mobile-optimized site is no longer a luxury—it’s a must.

4. Rock-Solid Security

Trust is the currency of the internet. If customers don’t feel safe on your site, they won’t shop. Period. Invest in SSL certificates to encrypt data, flaunt those security badges, and ensure your security protocols are tighter than Fort Knox. Remember, a secure customer is a happy (and returning) customer.

5. Stellar Customer Service

Sometimes, things go wrong. It’s how you handle these hiccups that can set you apart. Have a clear, visible policy for returns and exchanges. Offer multiple ways for customers to reach out with concerns, and respond swiftly and empathetically. Whether it’s a chatbot that’s available 24/7 or a dedicated support email, make sure your customers feel heard and valued.

6. Payment Processing: Make It Smooth

Ah, the grand finale—getting paid. To keep the checkout process as smooth as your favorite jazz tune, consider a reliable payment processor. For example, payment processing by North is good because they help you accept a wide array of payment options, from credit cards to digital wallets, ensuring every transaction is secure and swift. Because nothing kills the buzz of a shopping spree like a glitchy payment process.

7. Engaging Content That Keeps Them Coming Back for More

Finally, don’t let your site be a one-hit-wonder. Keep your content fresh, engaging, and relevant. From detailed product descriptions to blogs that resonate with your audience, provide value that goes beyond just selling products. It’ll boost your SEO, keep your audience engaged, and ensure your customers have a reason to visit again.

Here’s to a successful online operation!

How to Create a Subdomain and Install WordPress in Hostinger

0

Hey there, folks! Today, I’m going to walk you through how to create a subdomain and install WordPress in Hostinger. Having a subdomain for your website can make things so much more organized and convenient. So, let’s dive right in and get this done!

What is a Subdomain?

A subdomain is an additional part of your main domain. Think of it as an extension of your primary website that helps you organize different sections or categories of your site. For example, if your main website is “gadgetgyani.com,” a subdomain could be “shop.gadgetgyani.com” or “blog.gadgetgyani.com.” Subdomains function as separate websites but are connected to the main domain.

Why Are Subdomains Important?

Subdomains are crucial for a variety of reasons:

  1. Organization: They help in keeping different sections of your website organized.
  2. SEO Benefits: Subdomains can rank separately in search engines, giving you more opportunities to capture traffic.
  3. User Experience: They improve the user experience by making navigation simpler and more intuitive.
  4. Branding: Subdomains can be used to create specific brand experiences tailored to different audience segments.

Features and Benefits of Having a Subdomain

Improved Website Organization

With subdomains, you can keep different aspects of your website neatly organized. For instance, if you run an e-commerce site, you can separate your blog content from your product listings.

Enhanced SEO Opportunities

Subdomains can rank independently in search engine results. This means you can target more keywords and increase your chances of appearing in search results for various queries.

Better User Experience

Subdomains make it easier for users to find specific content on your site. By clearly separating different sections, you ensure that visitors can quickly navigate to the information they need.

Tailored Branding

Subdomains allow you to create distinct brand experiences for different audience segments. For example, you might have a subdomain dedicated to your online store and another for your blog, each with its unique design and branding.

Hostinger is a cheap, reliable, and fast web hosting service that ensures your website runs smoothly. Plus, you can get an extra discount if you purchase it from here! Click here and grab exciting discounts now!

How to Create a Subdomain and Install WordPress in Hostinger Step by Step

Step 1: Log In to Hostinger

First things first, log in to your Hostinger account. This is where all the magic happens.

Step 2: Manage Your Hosting Plan

Once you’re logged in, navigate to your web hosting plan. Click on “Manage” to access the settings.

Step 3: Access the Domain Tab

On the left-hand side, you’ll see a “Domain” tab. Click on it. Here’s where we’re gonna create the subdomain in Hostinger.

Step 4: Create a Subdomain

In the Domain section, you’ll find an option to create a subdomain.

  • Click on the “Subdomain” option.
  • In the “Create a new subdomain” section, enter the name you want for your subdomain. For example, I’m using “shop.gadgetgyani.com”.
  • In the “Custom folder” field, give a name for the folder, then click “Create”.

Boom! You’ve just created your subdomain. Easy peasy, right?

Step 5: Install WordPress on the Subdomain

Now, let’s move on to installing WordPress on this shiny new subdomain.

  1. Go back to the hosting dashboard. Scroll down till you see the “WordPress” option. Click on it.
  2. On the upper right-hand side, you’ll see your main domain. Click on it to open a drop-down menu and select your newly created subdomain.

Step 6: Start the WordPress Installation

  • Click on the “Install WordPress” button.
  • Fill in the details for your site, like admin username and password. Don’t mess with the other settings; they’re good as they are. If needed, enter a password for the database, then hit “Next Install”.
  • Give it a couple of minutes, and your WordPress will be installed.

Step 7: Access Your Admin Panel

Once the installation is done, click on the admin panel link on the right-hand side to access your newly created subdomain website.

Step 8: Remove Unnecessary Plugins

Finally, go to the “Plugins” section and remove any unnecessary Hostinger plugins. These are just cluttering your site and are not needed.

Conclusion

And there you have it! You’ve successfully created a subdomain and installed WordPress in Hostinger. Whether you’re learning how to create a subdomain in VPS Hostinger or just need to know how to create a subdomain on Hostinger in 2024, these steps will have you covered.

Remember to like, comment, and subscribe if you found this guide helpful. Let me know if there are any other tutorials you’d like to see. Thanks for watching, and happy website building!

Keywords:

  • how to create subdomain and install wordpress in hostinger
  • create subdomain and install wordpress hosting
  • create subdomain in hostinger
  • how to create subdomain in hostinger
  • how to create subdomain in vps hostinger
  • how to create subdomain on hostinger 2024
  • how to make subdomain website in hostinger

How to Nest Audio Tracks in Premiere Pro: Step-by-Step

0

Hey everyone! In today’s tutorial, I’m gonna show you how to nest audio tracks in Premiere Pro. Whether you’re just starting or you’ve been editing videos for years, this guide will help you organize your audio clips more efficiently. So let’s jump right in!

How to Nest Audio Tracks with Video Tracks in Premier Pro

Now to Nest Audio in Premiere Pro

Keywords: how to nest audio clips in Premiere, how to nest audio premiere pro, how to nest audio in Premiere pro, how to nest audio and video in Premiere pro, nest audio in Premiere pro, premiere pro tutorial nest audio, premiere pro nest audio, premiere pro nested sequence audio

Step-by-Step Guide to Nesting Audio in Premiere Pro

  1. Unlink Audio from Video:
    • First, select your video clip and unlink the audio from the video. This will separate the audio and video tracks, making it easier to work with.
  2. Add an Adjustment Layer:
    • Next, go to the “Project” panel and create a new adjustment layer. Drag this adjustment layer onto a new track in your timeline.
  3. Select Adjustment Layer and Audio Clips:
    • Hold down the Shift key on your keyboard and select both the adjustment layer and your audio clips. This will allow you to nest them together.
  4. Nest the Clips:
    • Right-click on the selected clips and choose “Nest”. This action will combine them into a single nested sequence.
  5. Delete the Adjustment Layer:
    • After nesting, you can delete the adjustment layer from the nested sequence in the timeline. Your audio and video clips will remain intact.
  6. Bring Nested Sequence to Timeline:
    • Grab the nested sequence from your “Project” panel and bring it back onto the timeline. You can then delete the original video clip if needed.
  7. Nest Your Video Clips:
    • Select your video clips and nest them as well. Once nested, relink the audio and video clips.
  8. Adjust Speed Together:
    • Now, you can adjust the speed of your nested sequence. For example, if you increase the speed of the clip, the audio speed will also increase accordingly.

And that’s it! Your audio is now nested, and you can easily manage it along with your video. This method is super useful for keeping your projects organized and making complex edits simpler.

How to Nest Audio Tracks with Video Tracks in Premier Pro

To make sure your video reaches the right audience, don’t forget to use keywords like “how to nest audio clips in Premiere”, “how to nest audio Premiere Pro”, and “how to nest audio and video in Premiere Pro”. Including these keywords in your title, description, and tags will help your video rank higher in search results.

If you found this tutorial helpful, please give it a thumbs up, subscribe to the channel, and leave a comment below if you have any questions or need further assistance. Let us know what you’d like to see next!

Thanks for watching, and happy editing!

How to Create a Corner Loading Bar in DaVinci Resolve: Step-by-Step Guide

0

Hey there, fellow video editing enthusiasts! Today, we’re diving into the exciting world of DaVinci Resolve. Specifically, we’re going to learn how to create a corner loading bar in DaVinci Resolve. This neat little trick will add a professional touch to your videos. Let’s get started!

How to create a corner loading bar in DaVinci Resolve

Tutorial of how to create a progress bar on Davinci Resolve

Step-by-Step Guide to Creating a Corner Loading Bar

  1. Select Your Clip: First things first, choose the clip where you want to add the progress bar. This is your canvas, so pick wisely!
  2. Add Solid Color:
    • Go to the “Generator” tab and grab a solid color.
    • Head over to the “Inspector” tab to change the color of this solid color clip. For this tutorial, I’m going with green.
  3. Crop the Color Clip:
    • Next, crop the solid color clip from either the top or bottom. It’s up to you! For this example, I’m cropping from the top.
  4. Adjust Thickness:
    • You now have a sleek line. Adjust its thickness to suit your needs. Make it as bold or as subtle as you like.
  5. Position the Line:
    • Place this line at the top of your video. It’s starting to take shape now!
  6. Create the Side Bar:
    • Copy the solid color clip and give it a 90-degree spin.
    • Place this new line on the left corner. Looking good, right?
  7. Complete the Corners:
    • Copy the remaining clips and position them in the other corners. Now you have a complete frame around your video.
  8. Animate the Bars:
    • Select the first clip and head to the cropping section.
    • Click on the “Crop Right” keyframe to animate it. This is where the magic happens!
  9. Disable Other Clips:
    • Temporarily disable the other clips to keep things simple and avoid any mix-ups.
  10. Animate Each Clip:
    • Animate each clip one by one using the same method. Take your time to ensure everything is perfect.
  11. Speed Up the Process:
    • For the sake of time, I’ll speed up this process here, but you should take your time to get it just right.

And there you have it, folks! Your very own corner loading bar in DaVinci Resolve.

Also Read:- How to Remove Green Screen in DaVinci Resolve 18: STEP BY STEP

Boosting Your Videos with SEO

Adding a corner loading bar isn’t just a cool effect; it can also help with video engagement. As you create content, don’t forget to optimize your videos with keywords like “how to create a corner loading bar in DaVinci Resolve”, “DaVinci Resolve progress bar tutorial”, and “video editing tips in DaVinci Resolve”. These will help your content reach a wider audience.

By following these steps, you’ve not only learned how to create a corner loading bar in DaVinci Resolve but also enhanced your editing skills. This guide is perfect for beginners and pros alike, showing you how to make your videos pop with a simple yet effective effect.

If you found this tutorial helpful, make sure to subscribe to the channel, like the video, and leave a comment below if you have any questions or if there’s something you didn’t quite understand. I’ll be making more tutorials based on your feedback.

Thanks for watching, and I’ll see you in the next video. Bye for now!

How to Earn Money Online by Sharing Breastfeeding Videos on Facebook

0
How to Earn Money Online by Sharing Breastfeeding Videos on Facebook

Introduction

Breastfeeding is a beautiful and essential part of motherhood that provides numerous benefits for both mother and baby. It’s not just about feeding your child; it’s about bonding, nurturing, and providing the best start in life. This article will explore various aspects of breastfeeding, from important facts to practical how-to tutorials. Whether you’re a new mom or looking for more information, this guide will offer valuable insights to make your breastfeeding journey successful.

Why Breastfeeding Matters

Breastfeeding is more than just a feeding method; it’s a way to give your baby a healthy start. The World Health Organization (WHO) recommends exclusive breastfeeding for the first six months of life, with continued breastfeeding along with appropriate complementary foods for up to two years or beyond. Here’s why breastfeeding is so important:

  • Nutritional Benefits: Breast milk is perfectly balanced to meet your baby’s nutritional needs.
  • Immune Support: It contains antibodies that help your baby fight off viruses and bacteria.
  • Bonding: Breastfeeding enhances the emotional bond between mother and baby.
  • Health Benefits: Reduces the risk of certain diseases for both mother and child.

Daily Breastfeeding Tips and Tutorials

To help you on your breastfeeding journey, here’s a day-by-day guide packed with facts and practical how-to tips.

Day 1: Proper Latch Technique

Fact: Breast milk contains antibodies that help your baby fight off viruses and bacteria. How-To: Demonstrate the proper latch technique to ensure effective breastfeeding.

A good latch is crucial for successful breastfeeding. Here’s how to do it:

  1. Positioning: Hold your baby close with their nose level with your nipple.
  2. Mouth Open Wide: Wait until your baby opens their mouth wide like a yawn.
  3. Nipple Aim: Aim your nipple towards the roof of your baby’s mouth.
  4. Attach: Bring your baby quickly onto your breast, ensuring they take a large mouthful of breast tissue.

Day 2: Breastfeeding Positions

Fact: Breastfeeding can reduce the risk of sudden infant death syndrome (SIDS). How-To: Show different breastfeeding positions (cradle, football hold, side-lying).

Different positions can make breastfeeding more comfortable:

  • Cradle Hold: Common and easy, with baby’s head resting in the crook of your arm.
  • Football Hold: Baby’s body is tucked under your arm, useful for moms with large breasts or those who had a C-section.
  • Side-Lying: Great for night feeds, both you and baby lie on your sides facing each other.

Also Read:- 8 Best Hidden Ways How to Make Money on WhatsApp 2024 | Making Money Online

Day 3: Burping Techniques

Fact: Breastfeeding burns extra calories and can help you lose pregnancy weight faster. How-To: Teach how to burp a baby after feeding.

Proper burping helps your baby release air swallowed during feeding:

  1. Over-the-Shoulder: Hold your baby against your shoulder and pat their back gently.
  2. Sitting Up: Sit your baby on your lap, support their chest and head, and rub their back.
  3. Face Down on Lap: Lay your baby face down across your lap and rub or pat their back.

Day 4: Storing and Thawing Breast Milk

Fact: Breast milk changes its composition as your baby grows to meet their nutritional needs. How-To: Explain how to store and thaw breast milk safely.

Follow these steps to ensure your breast milk is stored safely:

  1. Storage: Use clean, BPA-free bottles or bags. Label them with the date.
  2. Refrigeration: Store milk in the refrigerator for up to 4 days.
  3. Freezing: Freeze milk for longer storage, up to 6 months.
  4. Thawing: Thaw in the refrigerator overnight or place the bottle in warm water. Never microwave.

Day 5: Maintaining Milk Supply

Fact: Breastfeeding can delay the return of menstruation and ovulation. How-To: Tips on how to maintain milk supply.

To keep your milk supply up:

  • Frequent Feeding: Breastfeed often, at least 8-12 times in 24 hours.
  • Hydration: Drink plenty of fluids.
  • Balanced Diet: Eat a healthy, balanced diet.
  • Rest: Get as much rest as possible, as stress can impact milk production.

Day 6: Dealing with Common Breastfeeding Problems

Fact: Breastfeeding can enhance the bond between mother and baby. How-To: How to deal with common breastfeeding problems (e.g., sore nipples, engorgement).

Common issues and how to handle them:

  • Sore Nipples: Ensure proper latch, use nipple cream, and let nipples air dry.
  • Engorgement: The nurse frequently, uses warm compresses before feeding, and cold compresses after.
  • Blocked Ducts: Massage the area apply warm compresses, and ensure the baby drains the breast well.

Day 7: Diet for Breastfeeding Mothers

Fact: Breastfeeding lowers the risk of breast and ovarian cancer in mothers. How-To: Discuss the importance of a good diet for breastfeeding mothers.

A balanced diet helps you and your baby:

  • Nutrients: Focus on foods rich in vitamins and minerals like fruits, vegetables, and lean proteins.
  • Hydration: Drink plenty of water.
  • Avoid Harmful Substances: Limit caffeine and avoid alcohol and smoking.

Additional Engagement Strategies

B-Roll Integration

  • Use B-roll footage showing happy, healthy babies and moms to illustrate points.
  • Include scenes of peaceful breastfeeding moments, baby milestones, and everyday activities.

Sound and Commentary

  • Add soft background music to create a calming atmosphere.
  • Use a warm, friendly voiceover to deliver facts and tutorials.

Interactive Elements

  • Ask questions to engage viewers, such as “What breastfeeding tips work best for you?” and encourage them to comment.
  • Run polls related to breastfeeding challenges and solutions.

Call to Action (CTA)

  • Include a CTA to follow the page, share the video, or leave a comment with their own breastfeeding experiences.
  • Invite viewers to join a private Facebook group for more tips and community support.

Before and After the Video

  • Before: Tease the upcoming content by sharing a brief highlight or interesting fact that will be discussed in the video.
  • After: Offer a sneak peek of the next day’s topic to build anticipation and encourage viewers to return.

Personal Stories

  • Share personal stories from other moms (with their permission) about their breastfeeding journey.
  • Include testimonials and advice from breastfeeding experts or lactation consultants.

Visual Aids

  • Use graphics and animations to illustrate complex points, such as the anatomy of breastfeeding or the benefits of breast milk.
  • Incorporate text overlays to highlight key facts and tips.

Conclusion

Breastfeeding is a rewarding journey filled with challenges and triumphs. By staying informed and practicing the techniques discussed in this article, you can ensure a positive and successful breastfeeding experience. Remember, every mother and baby pair is unique, so find what works best for you. Stay engaged with our daily videos and community for ongoing support and tips. Happy breastfeeding!

Stree 2 Movie Release Date | Trailer | Review | Free Download Stree 2

0

Stree 2 Movie Release Date | Trailer | Review | Free Download Stree 2

Introduction

The anticipation for Stree 2 is palpable among movie enthusiasts and fans of the horror-comedy genre. Following the massive success of its predecessor, “Stree,” the sequel promises to deliver another dose of spine-chilling horror blended with rib-tickling humor. In this article, we delve into the details surrounding Stree 2, including its release date, cast, trailer, and much more. Buckle up as we explore the world of Stree 2!

Stree 2: A Sequel Worth Waiting For

The original “Stree” movie, released in 2018, thrilled and terrified audiences with its unique blend of horror and comedy. Naturally, the announcement of Stree 2 has generated a buzz of excitement. But what can we expect from this much-anticipated sequel?

Stree 2 Release Date: When Will Stree 2 Hit the Screens?

One of the burning questions on everyone’s mind is the Stree 2 release date. According to the latest updates, Stree 2 is set to hit the theaters in 2024. However, the exact release date has been a topic of much speculation. As of now, the official Stree 2 release date of 2024 is confirmed, and fans can expect the movie to grace the silver screen on 15 August 2024.

The Cast of Stree 2: Who’s Returning and Who’s New?

The cast of Stree 2 is a stellar ensemble of talent. Rajkummar Rao, who played the lead role in the first film, will be reprising his role as Vicky. Joining him will be Shraddha Kapoor, who left a lasting impression as the mysterious woman in the original. Pankaj Tripathi, Aparshakti Khurana, and Abhishek Banerjee are also set to return, bringing their unique charm and humor back to the sequel. The Stree 2 cast also includes some new faces, adding fresh energy and dynamics to the film. The most exciting news is Varun Dhawan has a special appearance in the film as BHEDIA

Also Read:- Thangalaan Movie | Release Date | Cast | Budget | Free Download | Review

Stree 2 Trailer: A Glimpse into the Horror-Comedy World

The official Stree 2 trailer has been released, fans are eagerly awaiting the film. The Stree 2 movie trailer is dropped a few days back before the movie’s release, giving us a sneak peek into the eerie yet hilarious world of Stree 2. The Stree 2 trailer release date is here watch and comment your views down below, so keep an eye out for that!

Stree 2 Poster: Setting the Tone

The Stree 2 poster has already been unveiled, and it perfectly captures the essence of the movie. With a haunting backdrop and a tagline that hints at more chills and thrills, the poster has successfully piqued the curiosity of fans. The artwork, combined with the intriguing tagline, sets the tone for what promises to be an unforgettable cinematic experience.

Behind the Scenes: The Making of Stree 2

Every great movie has its share of behind-the-scenes stories, and Stree 2 is no exception. The Stree 2 behind-the-scenes glimpses reveal the hard work and dedication of the cast and crew. From elaborate set designs to meticulous rehearsals, the making of Stree 2 is a fascinating journey in itself.

Stree 2 Songs: A Melodious Treat

Music plays a crucial role in enhancing the cinematic experience, and Stree 2 songs are expected to be no different. The soundtrack of the original Stree was a hit, and the sequel’s music is likely to follow suit. With a mix of haunting melodies and foot-tapping numbers, the songs of Stree 2 are sure to leave a lasting impression.

Stree 2 Budget: An Investment in Entertainment

The Stree 2 budget reflects the ambition and scale of the project. With a substantial investment, the filmmakers are leaving no stone unturned to ensure that Stree 2 surpasses its predecessor in every way. From high-quality visual effects to top-notch production values, the budget is being utilized to create a cinematic masterpiece.

Stree 2 on OTT: Will It Release on Netflix?

In today’s digital age, the question of an OTT release is always on the table. The film will premiere on Amazon Prime Video after its theatrical run, allowing fans to enjoy it from the comfort of their homes.

Stree 2 Full Movie Download filmyzilla

It is illegal to download the full movies from any other site but still, people upload Stree 2 movie on filmyzilla or many sites like this one.

Conclusion: The Wait for Stree 2 Continues

In conclusion, Stree 2 is shaping up to be a sequel worth waiting for. With a talented cast, an intriguing storyline, and the perfect blend of horror and comedy, the movie promises to be a thrilling ride. As we eagerly await the Stree 2 release date, the excitement continues to build. Whether you plan to watch it in theaters or on OTT platforms, one thing is for sure – Stree 2 is going to be an unforgettable experience. So, stay tuned for more updates, and get ready to be spooked and entertained in equal measure!

Nothing CMF Phone 1 Specification | Price | Review

0

Introduction

True budget phones are often uninspiring, but the CMF Phone 1 by Nothing breaks the mold. Priced at just £209, this phone offers more than meets the eye.

Design and Customization

The CMF Phone 1 boasts a modular design, allowing you to replace the rear case easily. No more generic plastic covers—here, the removable case is the back of the phone. With five screws and interchangeable colors, it’s both engaging and attractive1.

User Interface

Nothing’s custom UI, integrated with ChatGPT, keeps things clean and user-friendly. Say goodbye to bloatware and clutter.

Performance

While it won’t compete with flagship phones, the CMF Phone 1 performs admirably in everyday tasks. Its vibrant display and accessible price point make it a solid choice for budget-conscious users.

Conclusion

For those who appreciate aesthetics, performance, and a touch of uniqueness, the CMF Phone 1 is worth considering. It won’t disappoint at its price point.

Nothing CMF Phone 1 Feature

  1. Modular Design: The CMF Phone 1 features a unique modular design with a removable rear case. Customize your phone by easily swapping out colors or materials.
  2. Clean User Interface: Nothing’s custom UI keeps things clutter-free. Say goodbye to unnecessary bloatware and enjoy a streamlined experience.
  3. Affordable Price: Priced at just £209, the CMF Phone 1 offers impressive value for budget-conscious users.
  4. Everyday Performance: While not a flagship, the CMF Phone 1 handles everyday tasks smoothly, making it a reliable choice.
  5. Engaging Aesthetics: The interchangeable rear case and vibrant display add a touch of uniqueness to this budget-friendly phone.

Nothing CMF Phone 1 Specification

  • Design and Build:
    • Modular design with a user-replaceable back cover.
    • Splash-resistant.
    • Dimensions: Not specified.
    • Weight: Not specified.
    • SIM: Dual SIM (Nano-SIM, dual stand-by).
  • Display:
    • 6.7-inch AMOLED display.
    • Resolution: 1080 x 2412 pixels (20:9 ratio).
    • Refresh rate: 120Hz.
    • Brightness: 800 nits (typical), 2000 nits (peak).
    • Always-on display.
  • Platform:
    • Operating System: Android 14.
    • Chipset: MediaTek Dimensity 7300 (4 nm).
    • CPU: Octa-core (4×2.5 GHz Cortex-A78 & 4×2.0 GHz Cortex-A55).
    • GPU: Mali-G615 MC2.
  • Memory and Storage:
    • Internal Storage: 128GB.
    • RAM: 6GB or 8 GB.
  • Camera:
    • Rear Cameras:
      • 50 MP (wide, f/1.8) with PDAF.
      • 2 MP (depth, f/2.4).
      • Features: LED flash, panorama, HDR.
      • Video: 4K@30fps, 1080p@30fps.
    • Front Camera:
      • 16 MP (wide, f/2.0).
      • Video: 1080p@30fps.
  • Sound:
    • Loudspeaker: Yes.
    • 3.5mm jack: Unspecified.
  • Connectivity:
    • WLAN: Yes.
    • Bluetooth: Yes.
    • Positioning: GPS, GALILEO, GLONASS, BDS, QZSS.
    • NFC: Not available.
    • Radio: Unspecified.
    • USB: USB Type-C.
  • Sensors:
    • Fingerprint sensor (under-display, optical).
    • Accelerometer.
    • Proximity sensor.
    • Compass.
  • Battery:
    • Type: 5000 mAh (non-removable).
    • Charging: 33W wired.
  • Colors: Black.

The Nothing CMF Phone 1 offers an intriguing blend of affordability, customization, and performance!

Hamster Kombat: A Play-to-Earn Crypto Game | Web3 World

0

Hamster Kombat: A Play-to-Earn Crypto Game

Introduction

Hamster Kombat is a rapidly growing “play-to-earn” mobile game hosted on Telegram. Launched on March 25th, it has already attracted over a million users. In this article, we’ll explore what Hamster Kombat is, how to play the game, its legitimacy, and how to convert and withdraw Hamster Kombat Coins (HMSTR).

Hamster Kombat: Web3 Game

What Is Hamster Kombat?

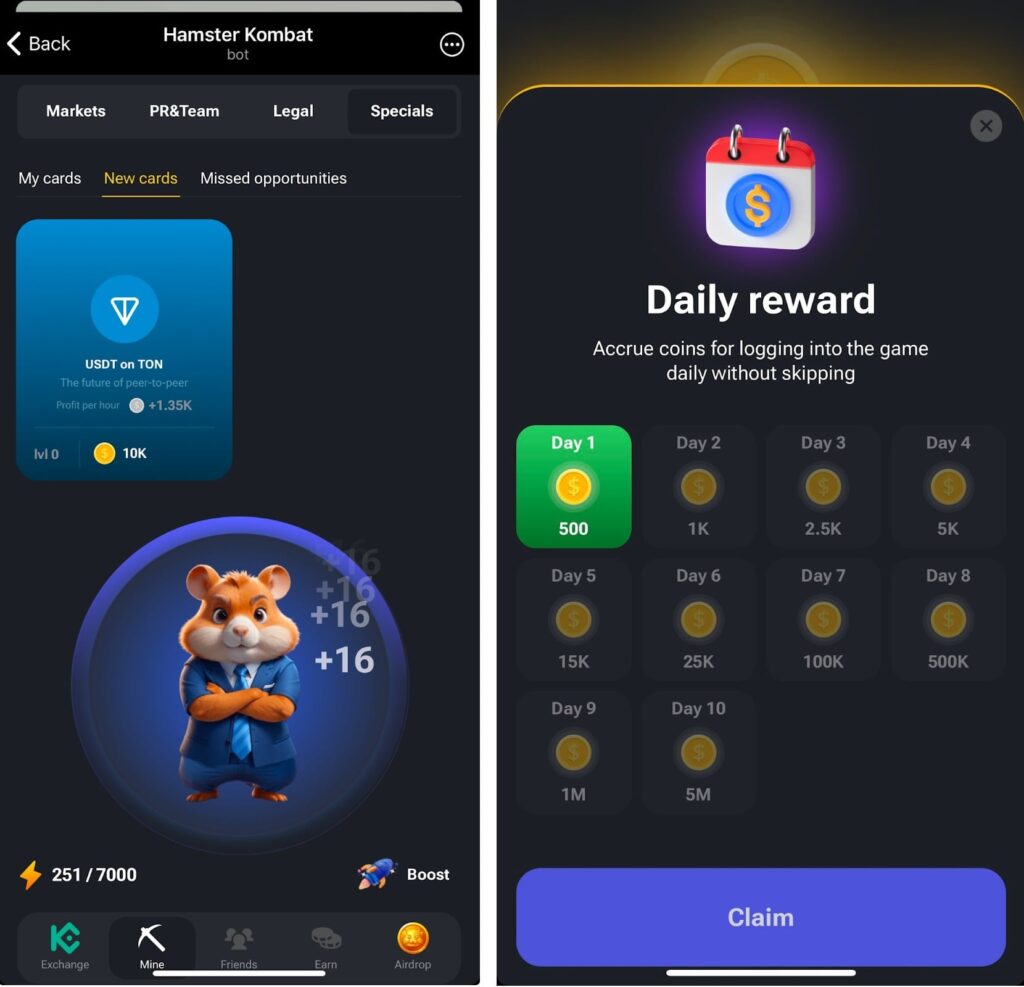
Hamster Kombat is a Telegram bot game that offers engaging and strategic gameplay. Players become CEOs of virtual crypto exchanges, managing their exchange operations. The game revolves around earning and using tokens to upgrade your hamster and build your crypto empire.

How to Play Hamster Kombat

  1. Start Small: Begin with a basic hamster.
  2. Earn Tokens: Collect tokens by tapping your device’s screen, completing tasks, inviting friends, and mining for passive income.
  3. Upgrade: Use earned tokens to upgrade your hamster and improve your exchange.
  4. Strategic Decisions: As the CEO, make decisions on marketing, PR, and legal matters for your crypto exchange.

Is Hamster Kombat Legit or a Scam?

Hamster Kombat is legitimate and has gained significant popularity. It allows players to earn in-game coins, which can be converted into real tokens for withdrawal. The game’s active community and regular updates contribute to its credibility.

Also Read- Top 33 List Of Best Dark WebSites | Onion Deep Web Lists | 2024 Updated, Working

How to Convert and Withdraw Hamster Kombat Coins

  1. Accumulate HMSTR: Play the game, complete tasks, and mine tokens to earn HMSTR.
  2. Exchange HMSTR: Convert your in-game HMSTR to real tokens on supported exchanges.
  3. Withdraw: Follow the withdrawal process on the platform where you exchanged HMSTR for real tokens.

How to Play Hamster Kombat Game

Hamster Kombat is a rapidly growing blockchain-based game that has overtaken cryptocurrency and gaming communities. Launched on March 25, 2024, the game has already amassed a staggering 148 million users in just a few months, making it one of the fastest-growing apps. Hosted on the Telegram app and integrated with The Open Network (TON) blockchain, Hamster Kombat offers an engaging and innovative play-to-earn (P2E) experience. So, if you’re ready to dive into the world of crypto hamsters, head over to Telegram and start tapping those digital rodents!

All About the Hamster Kombat Airdrop

Let’s dive into the exciting world of Hamster Kombat and its upcoming token airdrop. 🐹🚀

Hamster Kombat Airdrop: What You Need to Know

  1. Token Launch on The Open Network (TON):
    • Hamster Kombat plans to launch its token on TON, a layer-1 blockchain created by Telegram and now developed externally by the community1.
    • TON has gained significant traction, with its native token (Toncoin) surging into the top 10 cryptocurrencies by market cap.
    • The token generation event (TGE) is targeted for July 2024.
  2. Eligibility and Token Distribution:
    • Players’ eligibility for the airdrop will be based on their in-game activity.
    • While the number of tokens players can claim remains undisclosed, Hamster Kombat aims to incentivize its community with free tokens2.
  3. Community Building and Incentives:
    • Hamster Kombat thrives on community engagement and has an established team of long-term crypto players.
    • The game’s founders have even hinted at a second airdrop after the initial one on July 3.

Remember, always stay informed and DYOR (Do Your Research) before participating in any crypto-related activities. Happy hamster gaming! 

How to Participate in the Hamster Kombat Airdrop

To participate in the Hamster Kombat Airdrop, follow these steps:

  1. Open the Hamster Kombat Bot: Start by opening the Hamster Kombat bot in your Telegram app.
  2. Navigate to the Hamster Airdrop Tab: Locate the airdrop tab at the bottom right corner of the bot interface.
  3. Select the First Airdrop Task: Click the first task, which involves linking your TON wallet (e.g., Tonkeeper) to the game.
  4. Connect Your Wallet: Follow the prompts to connect your TON wallet to Hamster Kombat.
  5. Verify the Connection: Ensure that the wallet connection is successful.

Top Reasons Why You Should Start An Online Business

0

In today’s digital age, starting an online business has never been more accessible or more appealing. With the proliferation of the internet and advancements in technology, countless opportunities await those willing to venture into the online business world.

Here are some compelling reasons why you should consider starting an online business:

Low Startup Costs

One of the most significant advantages of starting an online business is the relatively low startup costs. Traditional brick-and-mortar businesses often require substantial capital for rent, utilities, inventory, and staffing. In contrast, an online business can be launched with minimal financial investment. You can start with just a computer, an internet connection, and a small budget for website development and marketing.

Global Reach

An online business allows you to reach a global audience. Unlike a physical store that caters to a local market, your online business can attract customers from all corners of the world. This vast reach increases your potential customer base and opens up opportunities for international growth and expansion.

Flexibility and Convenience

Running an online business provides unparalleled flexibility and convenience. You can work from anywhere with an internet connection, allowing you to travel, spend more time with family, or pursue other interests. Additionally, you can set your working hours, which is especially beneficial for those with other commitments or who prefer to work outside traditional office hours.

Scalability

Online businesses are highly scalable. As your business grows, you can easily expand your product or service offerings, reach new markets, and increase your marketing efforts without the constraints of a physical location. This scalability means you can adapt to changing market demands and customer needs more efficiently than traditional businesses.

Diverse Revenue Streams

The Internet offers numerous ways to generate revenue. Beyond selling products or services, you can explore various monetization strategies such as affiliate marketing, advertising, subscription models, and digital products like e-books or online courses. Diversifying your revenue streams can create a more stable and resilient business.

Lower Operational Costs

Operating an online business generally incurs lower ongoing costs compared to a physical store. You can save on expenses like rent, utilities, and in-store staff. Additionally, many online tools, platforms, and payment gateway solutions are available at a low cost or even for free, helping you manage and automate various aspects of your business, from accounting to marketing.

Data-Driven Decision Making

With an online business, you have access to valuable data and analytics that can inform your decision-making process. You can track customer behavior, preferences, and purchasing patterns, allowing you to tailor your marketing strategies and improve your products or services. This data-driven approach can lead to more effective business strategies and higher customer satisfaction.

Creative Freedom

Starting an online business gives you the freedom to express your creativity and passion. Whether you’re selling handmade crafts, offering consulting services, or creating digital content, you have the autonomy to shape your business according to your vision and values. This creative freedom can lead to a more fulfilling and enjoyable entrepreneurial experience.

In Conclusion 

Starting an online business offers numerous advantages, from low startup costs and global reach to flexibility and scalability. With the right mindset, tools, and strategies, you can create a successful and fulfilling online business that aligns with your passions and goals. Embrace the digital revolution and take the first step towards your entrepreneurial dreams today.

5,000FansLike
5,000FollowersFollow
4,000SubscribersSubscribe
deep web, dark web, hidden web, ddark internet, hidden stuff,

Top 31 List Of Best Dark WebSites | Onion Deep Web...

189
Onion Deep Web: Want some top 31 lists of onion deep web sites, but one question arises what kind of top 31 lists do...